Outlook macros for automatic email imports
Using Schedule it email alerts and automatically importing them using our Outlook macro
Email alerts allow each remote user to receive notifications from Schedule it and these can be imported or added directly to the calendar on their device. Embedded into each email is an invitation or appointment that can be added to most calendaring applications. If the user is using Outlook these can be accepted or declined directly from the email preview pane.
If the remote users are using Outlook it is also possible, with our special Outlook macro, to automatically detect the Schedule it email alert and add, update, or delete the matching Outlook calendar appointment without any user intervention. then processed email is then moved into a subfolder under the Inbox. Each user can add the Outlook macro to their local installation of Outlook and it can be triggered manually or automatically when new emails are received. It is also possible to send all emails for every resource to one master Outlook account running the macro. This macro can then read and update the calendar of the resource that the email was intended for.
Email Setup
- First in the menu Tools/Options/Email/Servers you must enter the details of your SMTP server, or enable Outlook, so Schedule it can send any emails created. You can choose the send alerts manually or automatically. For more details please see the email FAQ page here.
- In the menu Tools/Options/Email/Alerts disable the option 'Embed ICS/Calendar information'.
- Email Template - The email template used by each user must be updated to include the additional details needed by the Outlook macro so it can be routed correctly. In menu Tools/Options/Templates, select the 'Event - Email Alert' template and add the following data line to the end. In menu Tools/Options/Network, it is possible for you to select a common network path for all templates so all users share a common set rather than individual ones. The line to be added is:
(Scheduleit_Outlook_Import:SI-E-ID|SI-ICS-DateStart|SI-ICS-DateEnd|SI-ResourceEmailTrigger)
You can now test sending emails to be sure they are being sent by Schedule it and received by Outlook at the email addresses you enter into your resources.
Adding the macro to Outlook
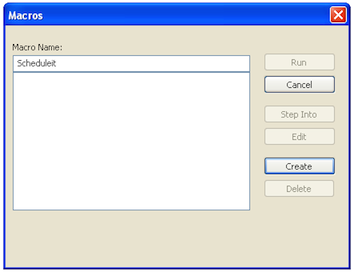
Once the email template has been modified and you have tested the emails are being sent and received correctly you can add the macro to Outlook on the PC running and receiving the email alerts. In Outlook choose menu Tools/Macro/Macros where you can enter a name for the macro 'Scheduleit' and then press Create. This should then present the Outlook module page for module1. You can remove all lines and paste the full macro that you can download from the link at the bottom of this page.

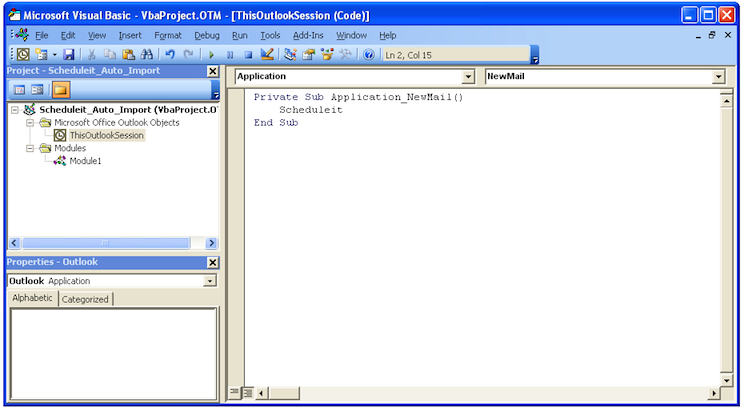
You can now run the macro manually at any time from the Outlook macros menu. From the 'ThisOutlookSession' you can also add the function 'Scheduleit' to the 'Application'+'New Mail' section so the macro is also run when any new email is received.
You can download the latest macro from here.
Last updated, 30 August 2023, 16:13
Still need help? Contact Us
Join Us - Live Webinar
...
Help Topics
Contact Us